Wow, it’s been a long time since I’ve updated this blog, and now that I’m back w/a new recipe…I can’t figure out the “improvements” WordPress has made to their systems! I can’t even add in a picture w/out losing my entire post- no good!

So, it’s off to Blogger we go- the address over there is thispoorkitchen.blogspot.com. See y’over there w/some new recipes! 🙂

I’m so glad that I keep up w/the food blog…it’s nice 😉

Anyway, our garden has been exploding w/veggie-goodness over the past few days, and it’s honestly pretty inspiring, food-wise, when you see so many yummy, home grown things coming into the house.

For instance, those beautiful tomatoes and gorgeous basil had me drooling over bruschetta…only we didn’t have any good bread in.  But then, that got me thinking of using my stand mixer to just make some bread, only quickly, bc most bread recipes seem to take hours for rising time.

I found this recipe on Pinterest, and it’s for French Bread (used for pizzas), and I loved it bc it only took about an hour and a half, start to finish, including rising time.  And, there were like, four ingredients.  Sold!

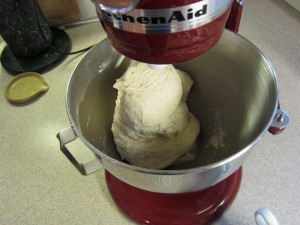
I forgot to take “before” pictures, so after mixing the ingredients together and then letting the dough rise for an hour, here’s the almost-finished product:

(I was pretty surprised that my dough had actually doubled like it should, bc I normally don’t have the best luck w/dough.  I love the stand mixer!)

Then, I formed the dough into a long sort-of log shape, and set it to bake for 30(ish) minutes:

Tada, bread!

PS- this is soooo good, too!  I couldn’t help cutting a few pieces off while it was still hot, and wow, warm bread and butter?  Really doesn’t get any better, if you ask me!

Later that night, I cut up the tomatoes, ripped up the basil, and we had bruschetta (w/chicken alfredo…bc we’re super-healthy over here!).  The bread was perfect- definitely a recipe I plan to use again and again 🙂

Presented beautifully on the prettiest cookie sheet I could find! 😉

This is by far one of the most delicious sides I’ve ever made- it’s so good, in fact, that tonight, this will most likely be my entire dinner! 😉

It’s really simple too- you just need 4o minutes to bake the sweet potatoes, but the prep literally took about 5 minutes.

Anyway, here’s the recipe, from Epicurious.com:

  • 4 medium sweet potatoes, peeled and cut into 1 1/2-inch-thick rounds
  • 3 tablespoons olive oil
  • 4 large garlic cloves, minced
  • 1/3 cup fresh thyme leaves, plus 6 thyme sprigs for garnish
  • 1/2 teaspoon kosher salt
  • 1/2 teaspoon red pepper flakes
Preheat oven to 450°F. In large mixing bowl, combine all ingredients and toss. Arrange potato slices in single layer on heavyweight rimmed baking sheet or in 13×9-inch baking dish. Place on top rack of oven and roast until tender and slightly browned, about 40 minutes. Serve warm or at room temperature, garnished with thyme sprigs.
——————-
Headed into the oven:
And, after roasting for 40-all done!
* Omgoodness, I can’t stop drooling- this is so good! *
You need to make these! 🙂
(I don’t know what’s going on w/the spacing…annoying!)

After being completely surprised w/a stand mixer from my parents as a house-warming gift (yay!), it just seemed like the time to start trying out recipes that I had been scared off by, bc they involved dough/bread.

I decided to start w/a recipe I found on Pinterest, one for homemade pretzel bites- and honestly, doesn’t the idea of making pretzels sound delicious?  I could eat bread all day, every day, so this was just perfect! 😉

Anyway, here we go- mixing the dough:

Then, let the dough rise for about an hr or so, just until it doubles:

After, divide the dough into 4 parts, and roll them out (I instantly thought of it like making playdough snakes when I was little!) into strips about 2-ft long.  Then, cut the strips into 1″ pieces:

Next, add the bits into a pot of boiling water and baking soda- boil for about…1o seconds?  Just enough for the bits to float.  Remove, add to a greased baking sheet, and coat w/egg wash.  Salt, and place into the oven at 425 for about 15 minutes.  (The recipe said 15-18, but at the 15-minute mark, I felt like mine were looking burned.)

And then…tada, pretzels bites!

Wow, these are so good, and so addicting, and well, I probably put on a few pounds after this experiment bc I couldn’t control myself.  So worth it!  🙂

I’m probably not going to be able to update regularly for awhile- bc we’re moving!!  And, whenever I cooked anything “creative” last week (ie, the fudge and even the silly cookies!), E was giving me a hard time bc didn’t I know that we had packing to do?  Sheesh. (Of course I know we’re moving- couldn’t be more excited about leaving the teeny condo behind for a real-live giant house!)

So, that said, it might be awhile until a new post- I may pop on w/things between now and the move (in two weeks!), and during our unpacking, but just wanted to let you know that it will most likely be awhile.

Thanks so much for reading, and I’ll (hopefully) be back soon! 🙂

Just a few little green things over here today- I really wanted to make green chocolate chip cookies, but kinda thought it’d look too weird.  So, I used green (and gold) sprinkles on them.  For the cookies, I used a recipe from AllRecipes.com, for the “best” chocolate chip cookies…which is funny bc just about every chocolate chip cookie recipe could legitimately be called that bc they’re all so good!

Also, I’m trying to make these banners a “tradition”- I made one for Valentine’s Day, and today made this one w/little shamrocks and “coins.”  I even taped up a few shamrocks around the house, bc I had loads of extras…I hope the kids appreciate the weird lengths I go to for their amusement!

Anyway, hope you all are having a great day! 🙂

Ok, I feel like lately, this blog is turning into a cry-for-help, in that…I cannot stop making all the bad-for-you desserts that we’re supposed to avoid!  And, it’s ten-zillion times worse when I make it, and it stays in my house for me and the family to eat, bc I don’t know about you, but that generally means that the kids will have some, E might have one piece or so, and yea, the rest is mine by default.  Gross.

Still, seeing (and drooling over) a fudge recipe on Pinterest is a sure-fire recipe for bathing suit-season disaster.  But, thankfully, that dreaded season is still months away, so bring on the homemade fudge! 😉

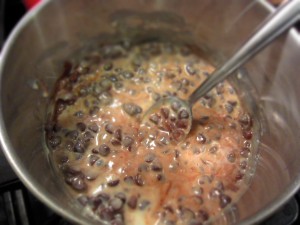
So, this truly couldn’t be easier- melt chocolate chips w/condensed milk and a dash of salt; remove from heat and add in some vanilla extract.  Tada, fudge.

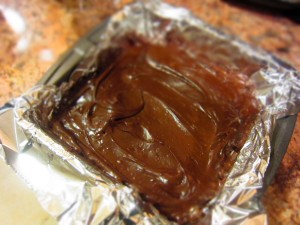
I’m pretty suspicious, so we’ll see- but the best part of this “we’ll see” is that the fudge has to cool for about 2 hrs, bringing it well past the kids bedtime.  Oh well, guess I’ll have to be the taste-tester this time! 😉

Be back in a bit!

——————————–

So…my “I’ll be back” turned into two years– sorry! 😉

This was a tricky recipe bc it seemed to change dramatically w/temperature.  Initially from the fridge, it tasted good but seemed like I had just put chocolate frosting in the fridge; it wasn’t “fudge-y,” just chocolately and sweet.  However, after the ride to my parents house (about an hour and a half), I tried it again, and it was GREAT- even the consistency was perfect.  But then…later that night, out of the fridge for a few hours, the vanilla seemed so overpowering and actually kinda gross.

So, if you know just when you’d like to serve this (down to the hour!), this is a great recipe, especially bc it’s crazy-easy!  But, it’s really difficult to judge how it’ll turn out over time, so I may just keep on searching for a fudge recipe! 🙂

These just looked too fun not to make- even though I’m not really a s’mores fan (it’s the marshmellows).  I’m a cute-dessert fan, and a chocolate fan, and…well, the kids thought this was a fun project, especially as it meant they got sweets before bed.

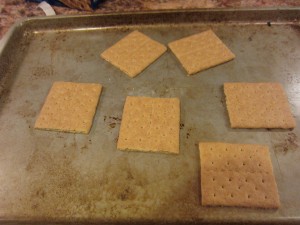
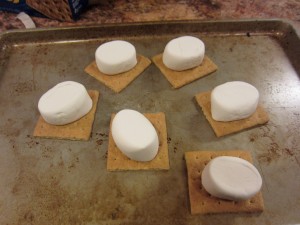
I broke a graham cracker in half, then cut a large marshmellow in half and stuck it sticky-side down to the cracker (oh, and please ignore the ugliest cookie sheet ever- the “good” ones were in the dishwasher!).

Then, into the broiler (on low) they went for literally two minutes- keep an eye on them bc one minute they’re fine, the next, burning.  Once you see a bit of brown, turn the pan- I had to, bc the marshmellows in the back weren’t browning, while the others were nearly burnt.

Then, once everything seems as dark as you’d like, take ’em out and pop on a Hershey kiss- three minutes tops from start to finish, and how cute is this?

The kids really loved this project- although a few of the s’mores ended up losing their kisses 🙂

And, being too little for s’mores doesn’t mean that you miss out on dessert- you just get a giant marshmellow to drool over!

E “customized” his s’mores…by adding French vanilla ice cream and some strawberries…yum:

Definitely a fun treat- and, for three minutes of prep time, totally worth it!

This recipe is from “Veganomicon”, a vegan cookbook I got awhile back when…ugh, it’s embarrassing to admit, but I got it right after baby #2 bc I wanted to lose baby weight fast- and so, I started eating vegan.  And I learned that that’s incredibly difficult, especially for someone who loves meat more than anything!  At any rate, the book has some really great recipes, and I still try to use it for meatless meal ideas.

Anyway, after making the vegetable broth yesterday, I really wanted to make some soup- and after a pantry reorganizing project the other day, I found that I have way too many bags of beans lying around.  So, here’s hoping to reduce that number by usin’ up some lentils!

Here’s the recipe- I’m going to do a photo-dump style post:

INGREDIENTS

  • 1 tablespoon olive oil
  • 1 large yellow onion, diced
  • 1 large carrot, peeled and cut into fine dice
  • 4 cloves garlic, minced
  • 2 teaspoons dried tarragon
  • 1 teaspoon dried thyme
  • 1 teaspoon paprika (Hungarian if you’ve got it)
  • 5 plum tomatoes, seeded and diced
  • 6 cups water or vegetable broth
  • 2 cups French lentils
  • 2 bay leaves
  • 1 1/2 teaspoons salt
  • Several pinches of freshly ground black pepper

INSTRUCTIONS

  1. Preheat a large pot over medium heat and add oil. Sauté the onion and carrots for about 10 minutes, until onions have browned a bit. Add the garlic, tarragon, thyme, and paprika, and sauté for 2 more minutes. Add the tomatoes and a little splash of water if necessary, and stir to deglaze the pot. Cover and cook for 5 minutes.
  2. Add the water, lentils, bay leaves, salt, and pepper, then cover and bring to a boil. Once the soup is boiling, reduce the heat to a simmer and cook, covered, for about 45 minutes, or until the lentils are tender. If the soup looks too thin, uncover and simmer for a couple more minutes. If it looks too thick, add a little more water. Serve with good, crusty bread.

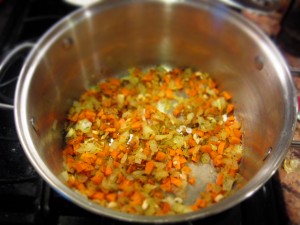
Sauteeing carrots and onions

W/garlic and herbs...I have to admit that the smell of tarragon kinda makes me queasy. It's the same way w/celery- once it's cooked, I'm fine 🙂

W/everything added in and simmering

And now, we wait- it should simmer for about 45 minutes, or until the liquid’s reduced a bit and the lentil’s are tender.  Be back soon!

———————————-

Wow, it’s really good- despite the tarragon! 😉  No, really…this is yummy!  If I have any criticism for the recipe, it’d be that there are WAY too many lentils- I didn’t even cook it for 20 minutes when the liquid was gone, and it was like lentil craziness.  Way, way too many lentils- if I made this again, I’d probably only use one cup, and not two.  This time, though, I scooped out some, and added in another cup of broth.

All set!

But wow, sooo good- the tarragon really adds something unique.  It’s much more of a complex blend of flavors than I might have thought, and wow, the leftovers will be so good for lunch!  (And I’m sure the yummy homemade broth had a lot to do w/this delicious meal…or, at least I’ll pretend it did!)

——————————-

E did have some “constructive criticisms” when he tried this- mainly that it was just a “giant bowls of beans” (It’s not, clearly- just look at that ingredient list up there, mister!  But again, this was why I think the amount of lentils should be cut down- seriously, it’s a lot!).  So anyway, for the leftovers, I’m going to add in more tomatoes and maybe even some roast chicken (we still have some leftover from the other night).  The flavor of the soup was really great…just maybe too many lentils! 🙂

I’ve saved the easiest broth for last!  Really, after fooling w/huge cow bones and chicken carcasses for beef and chicken stocks, a little veggie broth will be a breeze!  And, since I wanted to make soup for dinner tonight, it seemed like the perfect time to try out veggie broth-making.

I found this recipe on AllRecipes.com, and it’s listed as the “World’s Greatest Vegetable Broth,” and even has 4.5 stars.  Sounds perfect!

Here’s the list of ingredients:

  • 1 pound celery
  • 1 1/2 pounds sweet onions
  • 1 pound carrots, cut into 1 inch pieces
  • 1 pound tomatoes, cored
  • 1 pound green bell pepper, cut into 1 inch pieces
  • 1/2 pound turnips, cubed
  • 2 tablespoons olive oil
  • 3 cloves garlic
  • 3 whole cloves
  • 1 bay leaf
  • 6 whole black peppercorns
  • 1 bunch fresh parsley, chopped
  • 1 gallon water

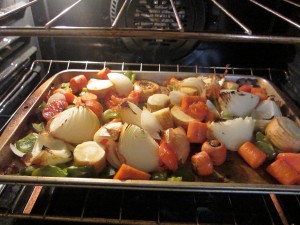
First, roast the onions, carrots, tomatoes, bell peppers, and turnips (all tossed w/olive oil) for a little over an hour at 450-degrees (oh, I used parsnips instead of turnips bc I had some, and didn’t wanna buy turnips!):

Gettin' roasted

Once the veggies were roasted, they went into the stock pot w/the celery and…well, everything else:

After that, it was boiled for about…maybe two hours?  The idea was to boil it until the liquid had reduced by half- I think it took about two hours.  When it was finished, I poured the mix through a colander, and discarded the veggies- I know I should have saved them, but…I didn’t.

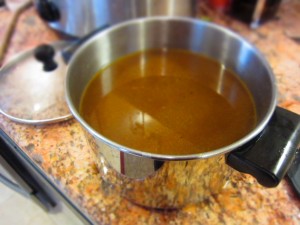
Anyway, tada- vegetable broth!  🙂